
Before you get too far into this experiment, you must make certain to install the special USB cable driver on your computer. The USB cable fools the computer into thinking it's talking to the Picaxe chip with an old serial connection (versus actual USB).
The instructions for doing this can be found on an included PDF file in the ZIP file you download, but I didn't have as easy a time installing it as the instructions suggest, so I wanted to walk through this in case there are others who encounter this issue. (Specifically, the screenshots in the PDF do NOT match what is seen on a Vista computer - they do include Windows 7 steps but my limited memory of using XP has me thinking the screenshots also DO NOT match the XP operating system - please feel free to correct me if you find the PDF is correct for XP.)
First, you need to be aware that I'm installing the driver on a Window Vista operating system, so these instructions may not match exactly with your OS... but I think you'll be able to get the basic idea of how to get around any hiccups you encounter.
The first thing you'll do (after downloading the driver - see previous post) is plug in the USB cable. My Vista laptop automatically detected it as seen in the first screen capture I'm including here. As you can see, it recognizes the cable as an AXE027 PICAXE USB device. But whereas the instructions show a nice little pop-up window that asks you to specify the location of the files, I never got this - I got an error message saying "Device Driver Could Not Be Found" and my only option was to click OK. So... it's off to the Device Manager (from a previous life as an IT consultant, I know my way around just enough to be dangerous and figure things out...)
 Open Device Manager by clicking Start, and then right-clicking on Computer and choose Properties. Click on the Device Manager option in the left column of the screen. As you can see in my 2nd screenshot, there's an exclamation point next to the device telling me there's a problem.
Next, I right click the AXE027 PICAXE USB device and choose Properties. On the window that appears, I click the "Update Driver" button and a screen appears like the one in the 3rd screenshot.
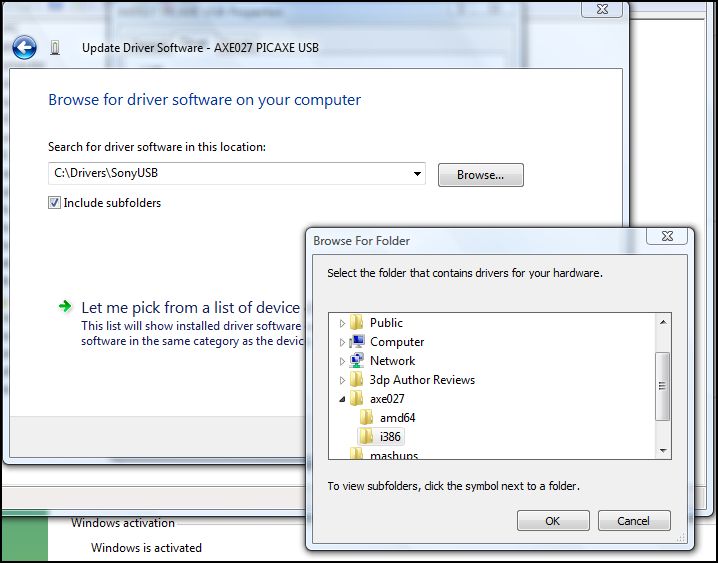
Click the Browse button and find the AXE027 folder that you unzipped from the driver download. In the screen capture, click on the axe027 folder and click OK.
If everything goes as planned, you should get a screen like the 4th screenshot tellign you the driver installed correctly.

Click the Close button and if you go back and look at the Device Manager screen, you should see that the device no longer has the little exclamation point next to it like my final screenshot here.

And that's it... for the driver install. Next, I'll install the Programming Editor software and get the circuit wired up.
No comments:
Post a Comment